The Original Bloons TD Classic
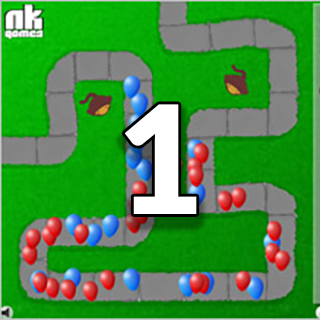
Released in August 2007 as a free Flash game, Bloons Tower Defense 1 (BTD1) launched the now-famous Bloons TD series. It was created by Ninja Kiwi as a spin-off of their Bloons puzzle game, inspired by the team's love of Warcraft 3 tower defense mods. The game quickly became a hit on browsers and is remembered as a classic that helped popularize the tower defense genre.
In BTD1, players defend a single maze-like track from waves of colorful "Bloons" (balloons) using a handful of quirky monkey towers. This humble first entry laid the groundwork for an enduring franchise, proving that simple mechanics and addictive gameplay can leave a lasting impact in tower defense history.
Gameplay Breakdown
How to Play
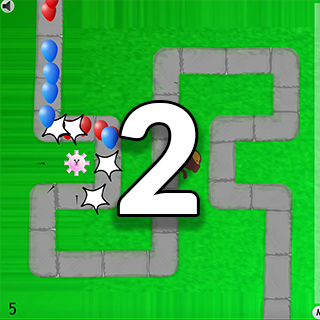
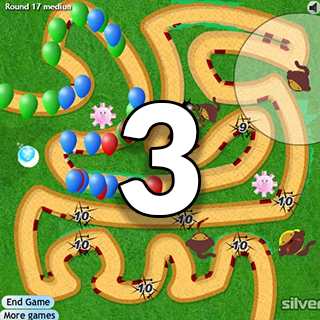
BTD1's gameplay is straightforward yet challenging. You use your mouse (or touch input on modern platforms) to select a tower and place it on the grassy area beside the track. Once placed, towers automatically attack any bloons within their range – there's no need for direct aiming. The objective is simple: stop the bloons from reaching the end of the track by popping them before they escape. Each bloon that sneaks through costs you lives; you start with 40 lives, and if you lose them all, it's game over.
Progression
Bloons enter in waves across 50 rounds, growing faster and tougher each level. Early rounds feature slow Red Bloons (the weakest), but soon you'll encounter layered Blue, Green, and Yellow bloons that move quicker and spawn another bloon when popped. Later stages introduce Black and White bloons – the strongest in BTD1 – which not only contain two yellow bloons inside but also have special immunities (black bloons resist explosions, and white bloons resist freezing). This escalating variety keeps the pressure on as you approach the final wave.
Controls & Mechanics
You earn money by popping bloons and completing rounds, which you then spend on buying new towers or upgrading existing ones. Each tower in BTD1 has a simple upgrade path – most can be upgraded twice (e.g. to increase power or range), while the Super Monkey has one very costly upgrade. Strategically managing your income is key: will you build more basic towers, or save up to upgrade a few into bloon-shredding machines? There is only one map and one difficulty level in this original game, so progression is linear – beat all 50 rounds to win. Between rounds you can reposition strategy, but you cannot maze or alter the track; victory relies purely on smart tower placement, efficient upgrades, and a balanced defense to handle any bloon that comes your way.
Core Monkey Towers Overview
Bloons TD 1 features 5 distinct towers to choose from, each with unique attacks and upgrade options. Below we highlight the key monkey towers and how to use them effectively:

Dart Tower
Your starter unit - cheap and effective
The Dart Tower (later known as the Dart Monkey) is your starting unit and the cheapest tower in BTD1. It's a small brown monkey that throws a single dart at nearby bloons, popping one layer per shot. Despite its simplicity, the Dart Tower is low-cost and very effective in early levels. You can purchase several of them right away with your starting cash to cover multiple points on the track.
Its upgrades make it even better: Piercing Darts lets each throw pop 2 bloons in a line instead of one, and Long Range Darts extends its attack radius. With both upgrades, a Dart Tower can handle groups of bloons much more efficiently.
When to use:
Almost always! The Dart Tower is the backbone of your defense in the early rounds. Place a few Dart Towers at strategic spots (e.g. near the track entrance and at key bends) and upgrade their pierce first for a solid foundation. They are cost-effective, so you can scatter several across the map to ensure no stray bloon goes un-popped.
Tack Tower
Area coverage specialist
The Tack Tower is a short-range device that shoots a volley of 8 tacks in all directions whenever bloons come into its range. This means it can hit multiple bloons around it simultaneously, making it great for area coverage. The Tack Tower costs a bit more than a Dart Monkey, but it excels at hitting multiple bloons at once and controlling crowds.
Its two upgrades improve its performance: Faster Shooting increases its rate of fire (launching tacks more frequently), and Extra Range Tacks allows its spread of tacks to reach farther out. With both upgrades, the Tack Tower becomes a rapid-fire pincushion that can shred bloons that linger nearby.
When to use:
Tack Towers are ideal for corners and intersections in the bloon track. Placing one at a curve or loop allows all 8 tacks to hit bloons as they turn, maximizing damage. They are especially useful against clusters of tightly packed bloons in early-mid rounds. However, because of their limited reach, be sure to put Tack Towers in spots where bloons will spend a lot of time.

Ice Tower
Crowd control support
The Ice Tower doesn't pop bloons directly; instead, it freezes them in place, acting as a support tower. When an Ice Tower's icy blast hits, all bloons in its radius are temporarily frozen and unable to move. This can massively slow down an oncoming rush, giving your other towers extra time to attack.
Keep in mind a few important caveats: frozen bloons become immune to sharp attacks – darts and tacks can't pop a frozen bloon until it thaws. The only direct way to pop frozen bloons is with explosive attacks (or by waiting for the freeze to wear off). Also, White Bloons are completely immune to being frozen, so the Ice Tower won't affect them at all.
When to use:
Ice Towers are best used as crowd control, especially against fast-moving bloons like Yellows. By freezing a rush of bloons, you allow your Dart and Tack towers to catch up and pop them once they thaw. A common tactic is to pair an Ice Tower with a Bomb Tower – freeze the bloons, then let a bomb blast obliterate the immobilized group.

Bomb Tower
Explosive area damage
The Bomb Tower is essentially a monkey-operated cannon that launches bombs which explode on impact, damaging all bloons in a splash area. It is one of your heavier hitters, with a high per-shot damage and area-of-effect that is ideal for blowing up clusters of bloons. A Bomb Tower shot can pop several layers of every bloon caught in its explosion, making it excellent against groups and later rounds when bloons come in dense packs.
Its first upgrade, Bigger Bombs, increases the explosion radius (hitting even more bloons around the impact). The second upgrade, Extra Range Bombs, extends the tower's firing range so it can shoot farther down the path. However, the Bomb Tower has a weakness: Black Bloons are immune to explosives, meaning your bombs will not affect them at all.
When to use:
Bomb Towers are crucial once bloon waves grow in number and toughness (mid to late game). Drop a Bomb Tower near the middle of the track or wherever bloons tend to clump up – the splash damage will soften up or eliminate clusters that would overwhelm single-target towers. Always back up your Bomb Tower with other towers to cover its weaknesses.

Super Monkey
Ultimate powerhouse
The Super Monkey is the ultimate tower of BTD1, an extremely powerful but very expensive unit. This caped monkey hero shoots a continuous stream of darts at hypersonic speed, far faster than any Dart Tower could. In practical terms, a Super Monkey can mow down bloons almost as soon as they appear, making it the go-to solution for the toughest bloon waves. However, at $4000 base cost, it demands significant saving up.
The Super Monkey in BTD1 has only one upgrade: Epic Range, costing a hefty $2400, which greatly extends its attack radius. With Epic Range, a Super Monkey can cover large sections of the track, sniping bloons from a great distance. Unupgraded or not, the Super Monkey's attack speed is its biggest asset – even the fastest and most stubborn bloons stand little chance if they're within its reach.
When to use:
Because of its price, you won't deploy a Super Monkey until the late-game rounds, but it can be a game-changer. Place the Super Monkey in a spot with long sightlines along the track or near high-traffic bloon paths – you want it to maximize time spent shooting bloons. Once deployed, though, the Super Monkey truly lives up to its name as a bloon-popping powerhouse.

Don't let this happen - follow our beginner tips below!
Beginner Tips
Getting started in Bloons TD 1 can be challenging, but these practical tips will help you succeed in the early waves:
Leverage Corners and Chokepoints
Place your towers at corners, bends, or intersections of the track to maximize their firing time on each bloon. Towers like Dart and Tack Shooters deal more damage when bloons are in range longer, such as when bloons curve around a corner. Smart placement can often make one tower do the work of two in a poor location.
Spam Cheap Dart Monkeys Early
In the first rounds, quantity beats quality. Fill the mid-section of the track with a few Dart Towers as your initial defense – they are cheap and effective in early levels. A group of 3-5 dart-throwing monkeys focused on different segments of the path will ensure no single bloon slips through.
Get a Bomb Tower Sooner Than Later
As soon as you start facing larger groups (e.g. several greens and yellows together), consider investing in a Bomb Tower. Its splash damage is ideal for grouped bloons and can wipe out clusters that would overwhelm your darts. Importantly, buy the Bomb Tower before an Ice Tower if you plan to use ice at all – only bombs can pop frozen bloons.
Prioritize Upgrades for Power
Don't be too quick to place one of every tower without upgrades. Often, upgrading your existing towers yields more benefit than buying a new one of the same type. For example, a Dart Tower with Piercing Darts (popping 2 bloons per shot) essentially doubles its effectiveness for a fraction of the cost of a second tower.
Use a Mixed Tower Strategy
No single tower can handle every type of bloon, so mix and match to cover all your bases. A balanced defense might include Dart Towers for general popping, a Tack Tower at a busy bend for area coverage, a Bomb Tower for explosive splash damage, and maybe an Ice Tower to stall fast bloons. This way, you're prepared for anything and protected from bloon immunities.
Master BTD1 and Beyond
With these tips and a bit of practice, you'll be well on your way to mastering the original Bloons Tower Defense 1. Enjoy the nostalgia and challenge of this classic – and watch those bloons go pop!
Sources: Bloons Wiki, AntGames Guide, Ninja Kiwi (2007).


